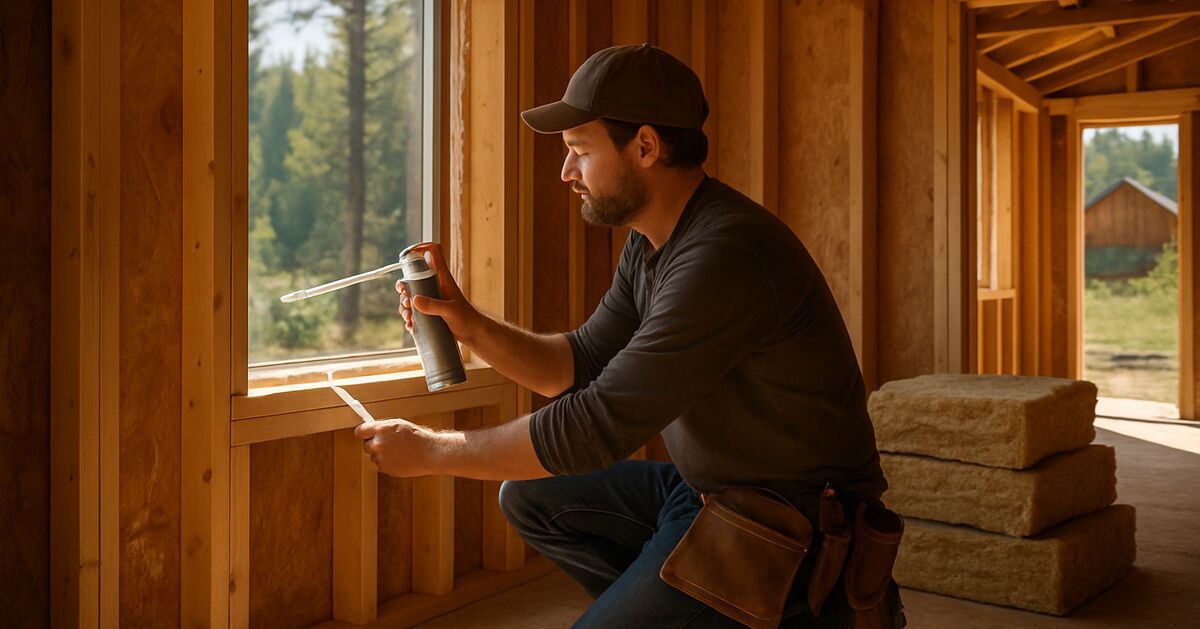
A cabin can be stuffed with insulation and still leak heat like a sieve. That's because insulation slows down conductive heat loss, but it does nothing to stop air from moving through gaps, cracks, and seams. Air leakage can be a major source of heat loss in a small structure, and it's the piece first-time builders often skip because it's tedious, unglamorous work compared to picking a roof pitch or choosing a foundation.
If you've already read our post on insulating an off-grid cabin so it holds heat and stays cool, think of this as the companion piece. Insulation is the blanket. Air sealing is making sure the blanket doesn't have holes in it. Off-grid, where every BTU of heat costs you split wood or propane you had to haul in yourself, and every watt of fan power comes off a battery bank, air sealing is usually cheap relative to the fuel it saves.
But there's a catch that doesn't apply to a grid-tied suburban house: an off-grid cabin usually has combustion appliances (a wood stove, maybe a propane heater or cookstove) and no mechanical fresh air system. Seal it too well without planning for makeup air, and you get problems ranging from a smoky stove to genuinely dangerous backdrafting. This post covers both halves of that problem: how to actually stop the leaks, and how to keep your cabin breathing safely once you have.
Why air leaks matter more in a small off-grid structure
A small cabin has a lot of surface area relative to its volume compared to a big house. That means every linear foot of gap around a window, every unsealed penetration where a wire or pipe goes through a wall, is a bigger percentage of your total building envelope than it would be in a 2,000 square foot home.
Warm air is also more buoyant than cold air, so it rises and pushes out through gaps in the ceiling and upper walls (the "stack effect"), pulling cold air in low, through the floor, rim joists, and door bottoms. In a cabin on piers or skids, as discussed in our foundation comparison post, that under-floor cold air infiltration can be brutal, because there's often nothing but a thin subfloor and maybe some batt insulation between your feet and the winter air moving underneath the whole structure.
The practical result: you run your wood stove harder, burn through your wood stack faster, and your battery-powered circulation fans (if you have them) run more to try to even things out. Every leak you close is wood you don't have to split and haul, and amp-hours you don't have to generate.
Where cabins actually leak
Common air-sealing guidance points to the same handful of trouble spots, and they're the same ones that show up on off-grid builds:
Top plate and ceiling penetrations. Where wiring runs from the wall cavity into the attic or roof space, where a wood stove flue passes through the ceiling, where a bathroom vent fan is installed. These are often the single largest leak by volume because they sit right where warm air wants to escape.
Rim joists and sill plates. The band around the outside edge of the floor framing, especially over a pier or skid foundation with an open or lightly skirted crawlspace.
Window and door rough openings. The gap between the window or door frame and the framed opening, which builders sometimes fill with a bit of fiberglass batt and call it done. Batt insulation alone does not stop air movement.
Electrical boxes and plumbing penetrations. Outlet boxes on exterior walls, and anywhere a pipe passes through a wall or floor.
The wood stove hearth and flue penetration. This one needs extra care because you cannot use standard caulk or spray foam near stove pipe. More on that below.
Corner framing and seams between different building materials. Anywhere plywood sheathing meets a different material, or two sheets of sheathing butt together.
The tools that actually matter
You don't need an energy auditor's full kit, but two things make a real difference:
A basic smoke pencil or even a lit incense stick, used on a cold, windy day with the stove off and a door cracked, will show you exactly where air is moving. Hold it near suspect seams and watch which way the smoke bends.
A can of quality polyurethane spray foam (the gun-grade kind, not the cheap straw-can stuff) for larger gaps, and a tube of good exterior sealant or acoustic sealant for smaller cracks and seams. Acoustic sealant is sold as staying flexible, which matters because a wood cabin moves seasonally as humidity changes, and a brittle caulk can crack and reopen the leak.
For anything within a few feet of the wood stove or flue, use only high-temperature, fire-rated sealant rated for that purpose, and follow the clearance requirements in our chimney and flue safety guide. Standard spray foam is combustible and is not rated for stove pipe clearances, so use only sealants rated for high temperature there.
A practical sealing order of operations
Work top to bottom, since that's the order air actually moves through the building.
1. Attic and ceiling plane first. Before insulation goes in (or after, if you're retrofitting, by pulling back batts temporarily), seal every wire penetration, every flue chase, every seam where the ceiling drywall or paneling meets the top plate. This is the highest-value sealing work you can do in the entire cabin.
2. Rim joists and floor framing. From inside a crawlspace or from underneath if the cabin's on piers, seal the band joist all the way around with foam, then insulate over it. If you skipped skirting on a pier foundation, consider adding it. Skirting doesn't just look tidier, it blocks wind from moving freely under the floor, which reduces cold air infiltration.
3. Window and door rough openings. Pull the trim if you can, and replace batt-only gap fill with a bead of low-expansion foam (the kind made specifically for windows and doors, which won't bow the frame) plus backer rod and sealant on the exterior trim line.
4. Electrical and plumbing penetrations. Foam or caulk around every box and pipe on an exterior wall. Foam gasket pads behind outlet and switch covers on exterior walls are a cheap five-minute fix that's easy to forget.
5. Wall seams and corners. Where sheathing panels meet, tape the seams with a proper sheathing tape if you're building new, or caulk from outside if retrofitting an existing cabin.
The part everyone forgets: makeup air
Here's the trap. A cabin with a wood stove and no mechanical ventilation relies on infiltration, the very air leaks you're trying to close, to supply combustion air to the stove and to replace air pulled out by any exhaust fans (bathroom fan, range hood, even a bathroom vent). Seal the building too tightly without addressing this, and you can end up with:
A smoky stove that won't draft properly, especially when you first light it
Negative pressure in the cabin that pulls flue gases (including carbon monoxide) back down the chimney or out around the stove door
Excess moisture buildup indoors, since sealing air leaks also seals in humidity from cooking, breathing, and (if you have one) an indoor greywater or laundry setup, an issue covered in more depth in our post on off-grid laundry and dishwashing wastewater
The fix isn't to leave the cabin leaky. It's to seal the accidental gaps and add controlled, deliberate fresh air instead. A dedicated outdoor air kit for your wood stove (many modern stoves have a port for this) ducts combustion air directly from outside to the firebox, so the stove isn't pulling its air supply from the room. This is usually the cleanest fix for a tightly sealed cabin with a wood stove, since the stove no longer competes with the room for air.
If your stove doesn't have that option, a small, simple passive vent (a through-wall vent with a damper you can close when not needed) placed near the stove gives it a dedicated air source that you control, instead of relying on whatever gap happens to be leaking that day.
For cooking, this same logic applies. If you're running a separate cooking setup as discussed in our cooking heat vs space heat post, make sure whatever range or cooktop you use has somewhere for its exhaust and combustion byproducts to go, especially propane appliances, which should never be run in a sealed space without ventilation.
Watch the moisture, not just the temperature
A well-sealed cabin holds humidity as well as heat. That's mostly good, dry winter air is uncomfortable and hard on wood furniture and instruments, but it means you need to actually pay attention to indoor humidity rather than assuming it'll take care of itself.
Signs you've sealed well but need more fresh air exchange: condensation forming on the inside of windows, a musty smell developing, or visible moisture on cold wall surfaces. A cheap hygrometer (fifteen dollars, batteries only, doesn't touch your solar budget) tells you where you stand. A commonly cited target is roughly 30 to 50 percent relative humidity indoors through winter. Below that and everything feels dry and static-prone. Above that and you're inviting mold on cold surfaces and condensation in wall cavities, which is a much bigger problem than a drafty cabin ever was.
If humidity runs high, a few minutes of cracking a window on a dry day, run on a schedule rather than left to chance, does more good than people expect. Some off-gridders wire a small bathroom exhaust fan to a timer or a humidistat switch so it only runs when needed, keeping the battery draw modest, an approach worth discussing when you're wiring your solar system since fan circuits need to be sized and fused properly like anything else on the DC or AC side of your system.
What this actually saves you
It's hard to give a precise number because every cabin, climate, and stove setup is different, but sealing air leaks is widely recommended alongside insulation as a way to cut heat loss. Sealing it up is inexpensive compared to almost anything else on an off-grid build list. Foam, caulk, a smoke pencil, and a weekend of careful work costs a fraction of what you'd spend re-doing insulation or upsizing a wood stove, and the payoff shows up every single day you're burning wood or running a heater.
It also has a knock-on effect on your battery bank. Less heat loss means less demand on any electric backup heat sources, less strain from running fans to redistribute warmth, and a cabin that holds its temperature overnight instead of dropping fast the moment the stove burns down. That matters directly if you're trying to keep a battery bank alive through winter, since a cabin that holds heat well lets you rely less on any resistive or electric backup heat, which is one of the fastest ways to drain a bank on a cloudy week.
When to bring in help
Air sealing is genuinely doable yourself, and most of it is hand-tool and caulk-gun work that doesn't require special skills, just patience and a methodical walk-through of the building. Where it gets trickier is around the stove and flue, where the wrong material or a mistake in clearances is a fire risk, and around ventilation planning, where getting the combustion air supply wrong can create a carbon monoxide hazard rather than just a comfort problem.
A tight, well-ventilated cabin isn't complicated to build. It just takes doing the unglamorous work in the right order, and remembering that sealing and breathing are two sides of the same job, not opposites.
The rest of the shortlist
Recommended off-grid gear
Affiliate disclosure: Some links on this site are affiliate links, including Amazon links: as an Amazon Associate I earn from qualifying purchases. Buying through one costs you nothing extra, and it never changes what I recommend.
Products appear here only when they match this article's subject. Selection is based on documented specs and owner reports, never on compensation; pages with no relevant gear carry none.
The InstaFire Vesta self-powered indoor heater and stove bundled with 24 cans of canned heat fuel, for power-outage heating and cooking; check the current spec sheet.
The InstaFire Vesta self-powered indoor heater and stove bundled with canned heat cooking fuel, for power-outage heating and cooking; check the current spec sheet.
Claim audit: 17 consequential claims checked against the article's sources; unsupported wording revised where it could not be substantiated.
Claim-by-claim audit (17 checked)
“Air leakage can be a major source of heat loss in a small structure, and it's the piece first-time builders often skip because it's tedious, unglamorous work compared to picking a …” (rewritten to what the article can stand behind)
“Off-grid, where every BTU of heat costs you split wood or propane you had to haul in yourself, and every watt of fan power comes off a battery bank, air sealing is usually cheap re…” (rewritten to what the article can stand behind)
“Seal it too well without planning for makeup air, and you get problems ranging from a smoky stove to genuinely dangerous backdrafting.” (cited → nfpa.org)
“Common air-sealing guidance points to the same handful of trouble spots, and they're the same ones that show up on off-grid builds:” (rewritten to what the article can stand behind)
“These are often the single largest leak by volume because they sit right where warm air wants to escape.” (reasoning shown in the article)
“Batt insulation alone does not stop air movement.” (cited → energystar.gov)
“Acoustic sealant is sold as staying flexible, which matters because a wood cabin moves seasonally as humidity changes, and a brittle caulk can crack and reopen the leak.” (rewritten to what the article can stand behind)
“Standard spray foam is combustible and is not rated for stove pipe clearances, so use only sealants rated for high temperature there.” (rewritten to what the article can stand behind)
“This is the highest-value sealing work you can do in the entire cabin.” (reasoning shown in the article)
“Skirting doesn't just look tidier, it blocks wind from moving freely under the floor, which reduces cold air infiltration.” (rewritten to what the article can stand behind)
“Negative pressure in the cabin that pulls flue gases (including carbon monoxide) back down the chimney or out around the stove door” (cited → nfpa.org)
“This is usually the cleanest fix for a tightly sealed cabin with a wood stove, since the stove no longer competes with the room for air.” (rewritten to what the article can stand behind)
“A commonly cited target is roughly 30 to 50 percent relative humidity indoors through winter.” (rewritten to what the article can stand behind)
“Above that and you're inviting mold on cold surfaces and condensation in wall cavities, which is a much bigger problem than a drafty cabin ever was.” (reasoning shown in the article)
“It's hard to give a precise number because every cabin, climate, and stove setup is different, but sealing air leaks is widely recommended alongside insulation as a way to cut heat…” (rewritten to what the article can stand behind)
“Sealing it up is inexpensive compared to almost anything else on an off-grid build list.” (cited → energystar.gov)
“especially propane appliances, which should never be run in a sealed space without ventilation” (cited → nfpa.org)
Before you go
One useful off-grid email a week.
Practical gear rundowns, honest how-tos, and plain-English guides from someone doing the homework in the open.
I am building a place for off-grid people to swap real answers: a forum by topic, classifieds for gear and services, and real estate for off-grid land and homes. It is new, so the early members shape what it becomes. A free account lets you post in all three.
No ER ten minutes away means you have to be your own triage nurse. Here's how to tell a bad bee sting from the real emergency, and what to actually stock.
In many off-grid disasters, the fire or flood itself isn't the decisive factor, it's the hour you waited too long to leave. Here's how to set real, numeric triggers before you need them.
Tax sale and sheriff's auction land looks like a bargain, but redemption periods, hidden liens, and unseen parcels turn a lot of cheap acreage into an expensive lesson. Here's how to vet a listing before you bid.